Summaries
Epilog can write the recap for you — and not just for a single day. Summaries span real stretches of time — day, week, two-week, month, quarter, half-year, and year — always anchored to whichever day you’re viewing. Each one is a plain-language overview plus highlights from each of your journals. It’s optional, and you choose who does the writing.
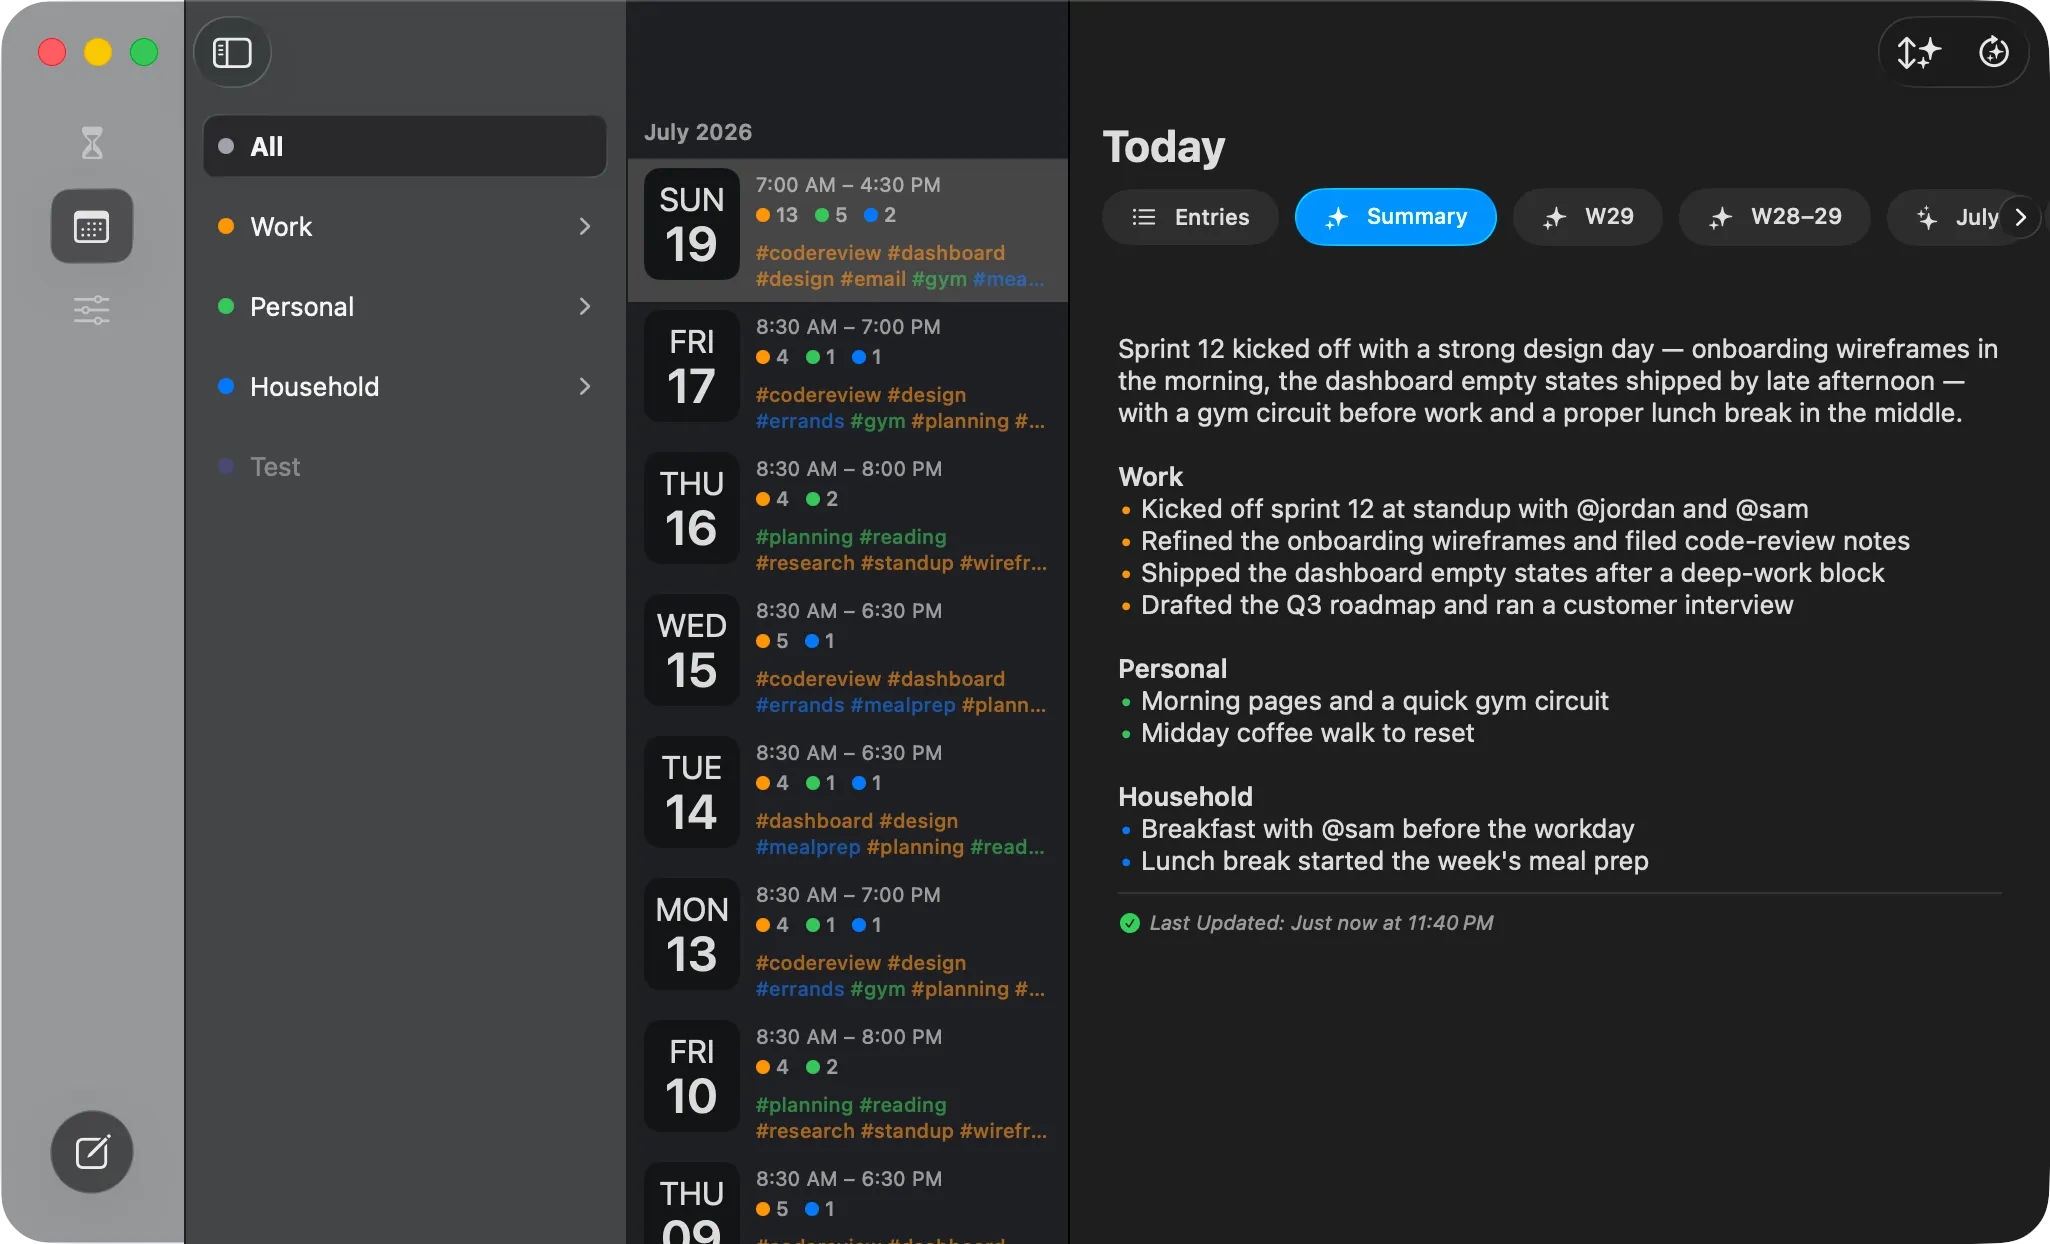 A day’s Summary page — the overview up top, a section per journal with bulleted highlights, and the Last Updated row at the bottom.
Where summaries live
Section titled “Where summaries live”Summaries live in My Days. Open any day and a row of pills sits above it — flip from Entries to Summary for that day’s recap, or over to a period pill like W29 or July for the bigger picture.
The one exception is Today: your current day’s summary shows inline on the Today screen itself, above the entries. No pills there — Today stays simple.
Day, week, and two-week summaries
Section titled “Day, week, and two-week summaries”The Summary, Week, and Two-Week pills are always on the bar, each named for the period the day you’re viewing falls in — W29, W28–29. These shorter summaries can keep themselves current: with the matching Auto-generate switch on (see Tuning below), opening one of these pills quietly regenerates the summary whenever your entries have changed since it was last written. Prefer manual? Leave the switch off and refresh whenever you like with the toolbar’s Refresh Summary button.
Month and beyond: AI that asks first
Section titled “Month and beyond: AI that asks first”The longer summaries — Month, Quarter, Half-Year, Year — are different: Epilog generates them only when you ask. They’re never auto-generated, because a long stretch means many entries — and with a cloud provider, real tokens and real money.
Tap the + pill at the end of the bar to open the Select Summary Period sheet. It shows who’ll be doing the writing (say, Claude · your model · your effort level, or Apple Intelligence · On-device model), then one row per period — Month: July 2026, Quarter: Q3 2026 — each with an estimate of the tokens and cost involved. Periods with nothing in them say so: “Nothing to summarize yet — no entries in this period.”
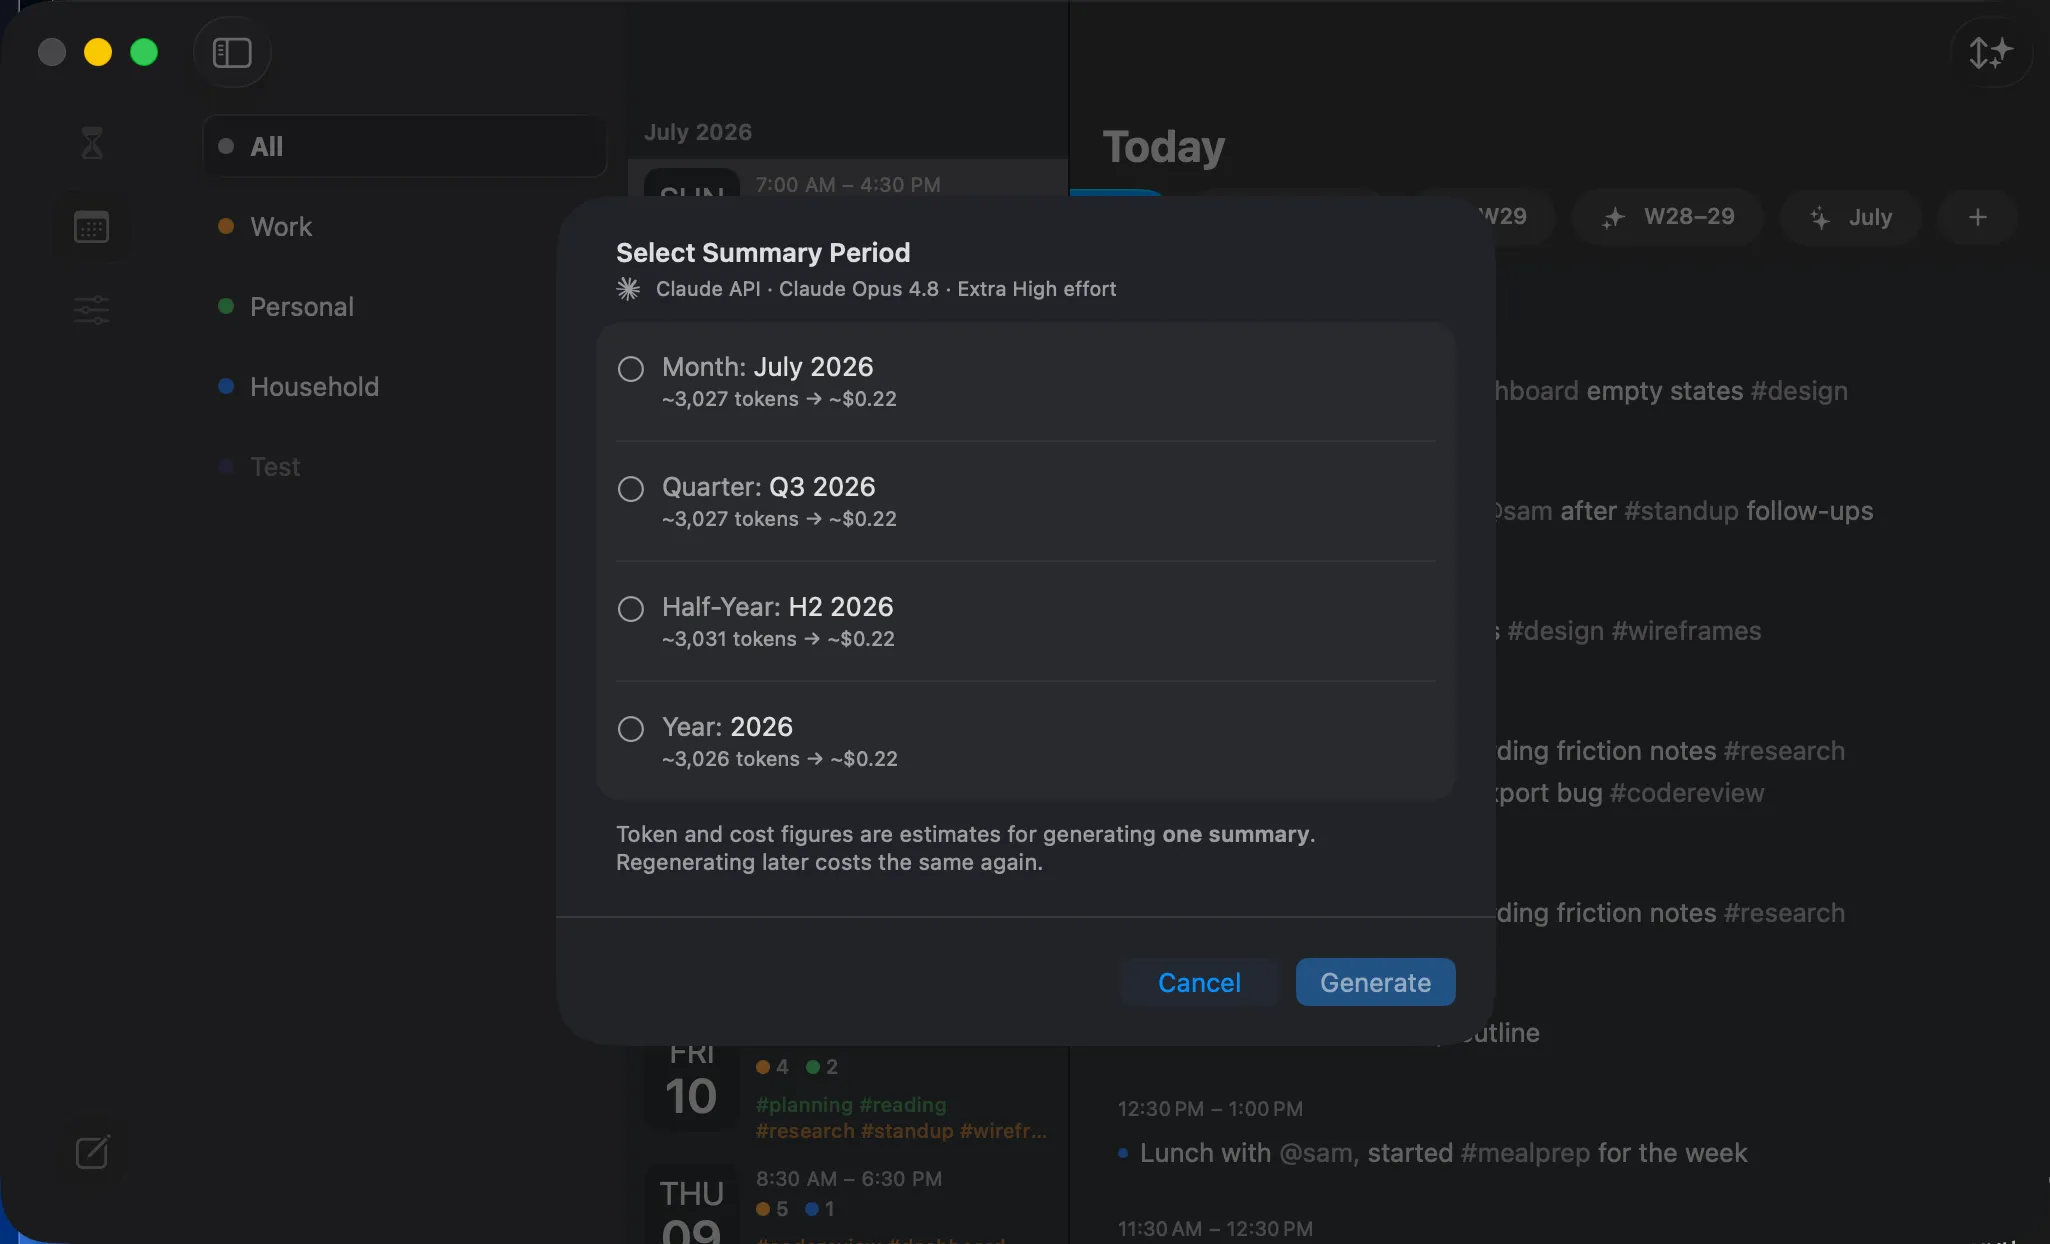 The Select Summary Period sheet — the provider line up top and one row per period. On-device summaries are free; cloud providers show token and cost estimates here.
Pick a period, hit Generate, and Epilog asks once more before committing — a confirmation like “Generate July 2026 Summary?” that spells out roughly how many tokens it’s about to send and what that costs. On-device summaries confirm too (they’re free, but a long period can take a while). Nothing is sent, and nothing is billed, until you say yes.
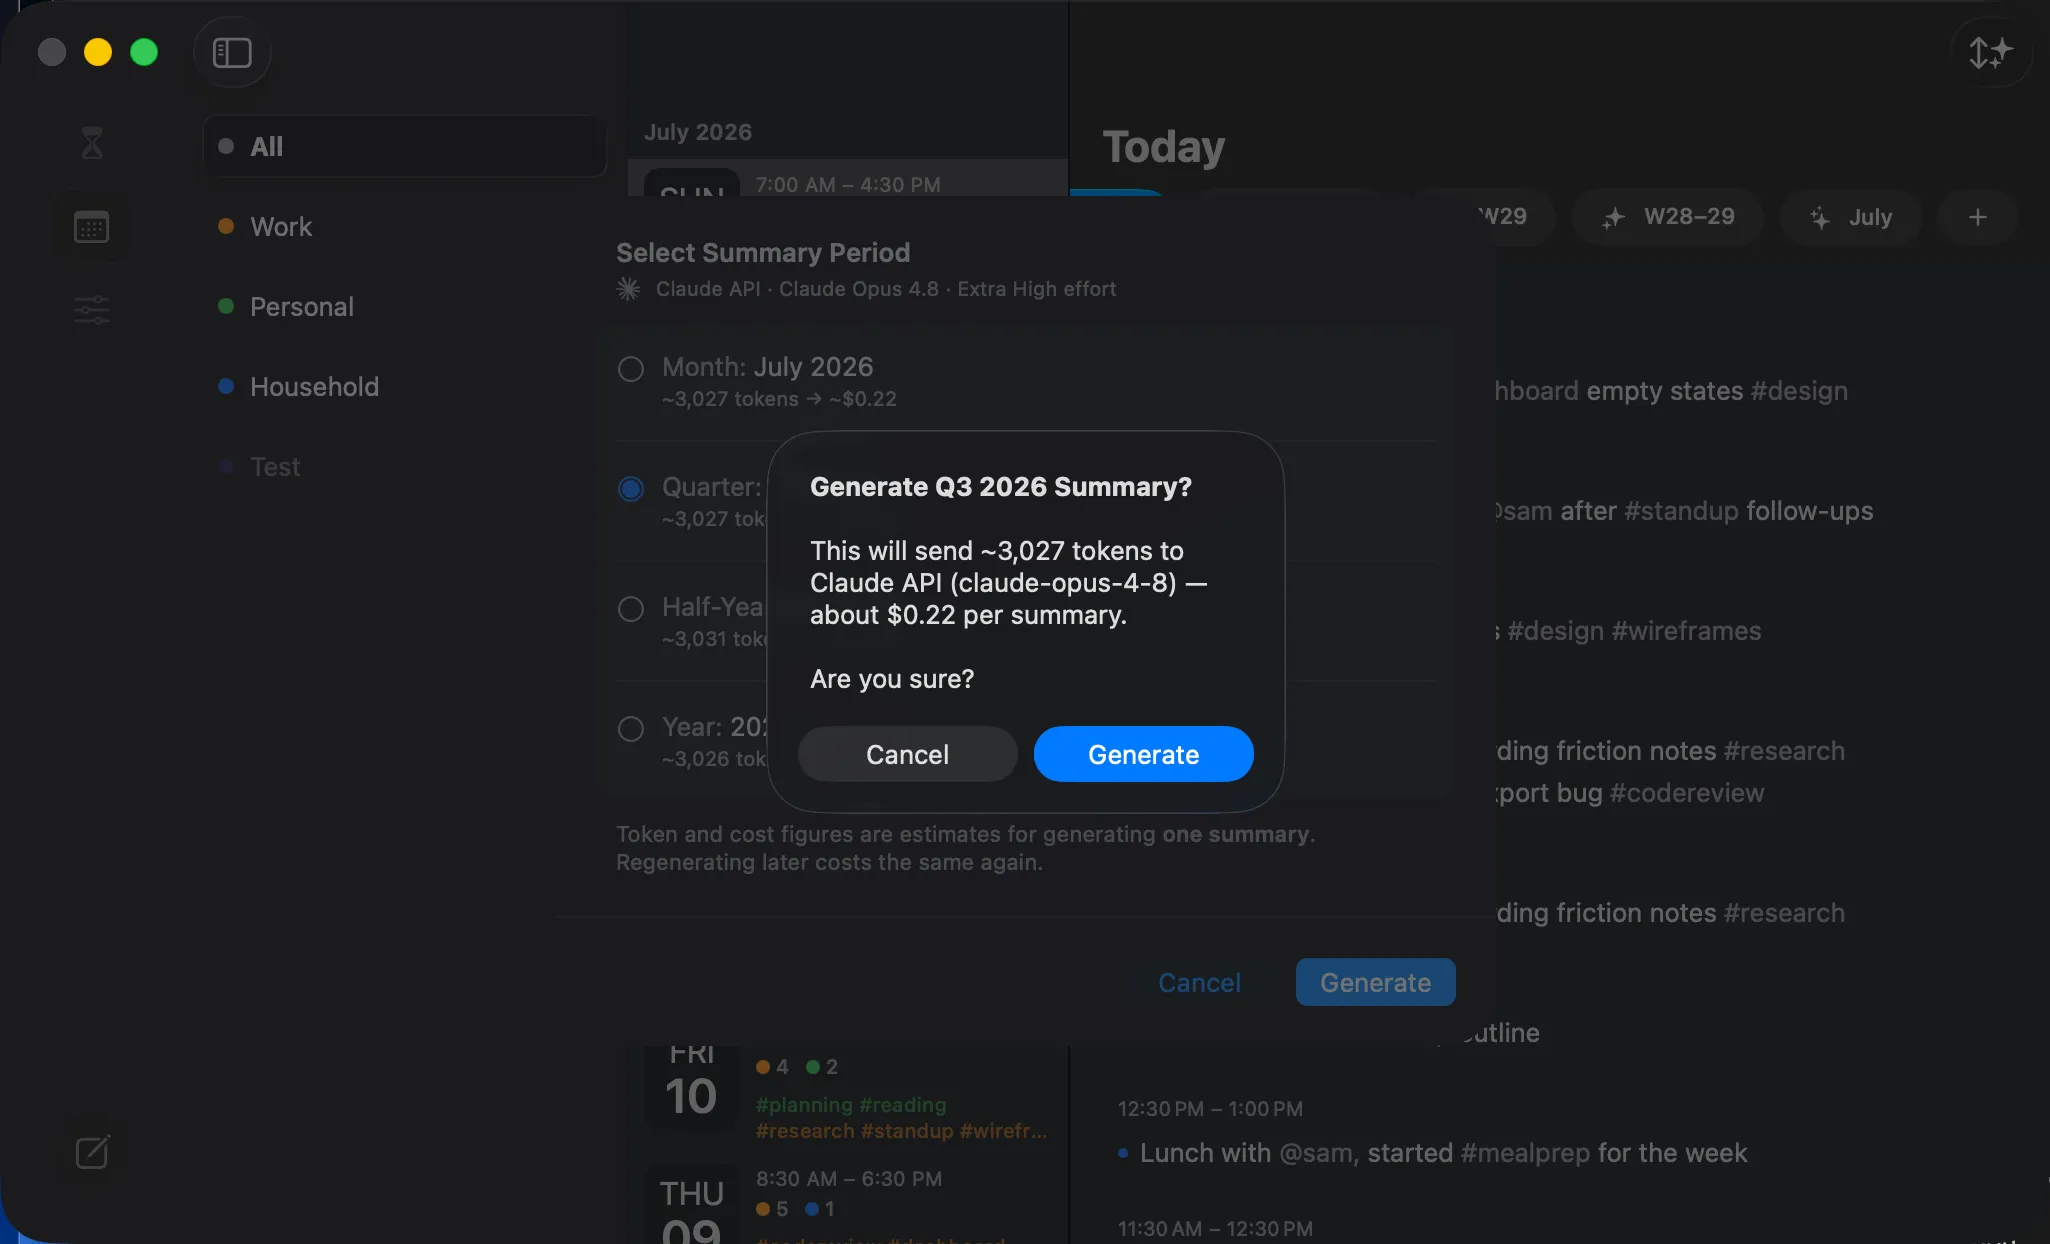 The confirmation before anything runs — with a cloud provider, this line shows the token count and price instead.
Once generated, that period gets its own pill on the bar, and its page opens with a header naming the stretch — July 2026, Q3: Jul – Sep 2026, H2: Jul – Dec 2026.
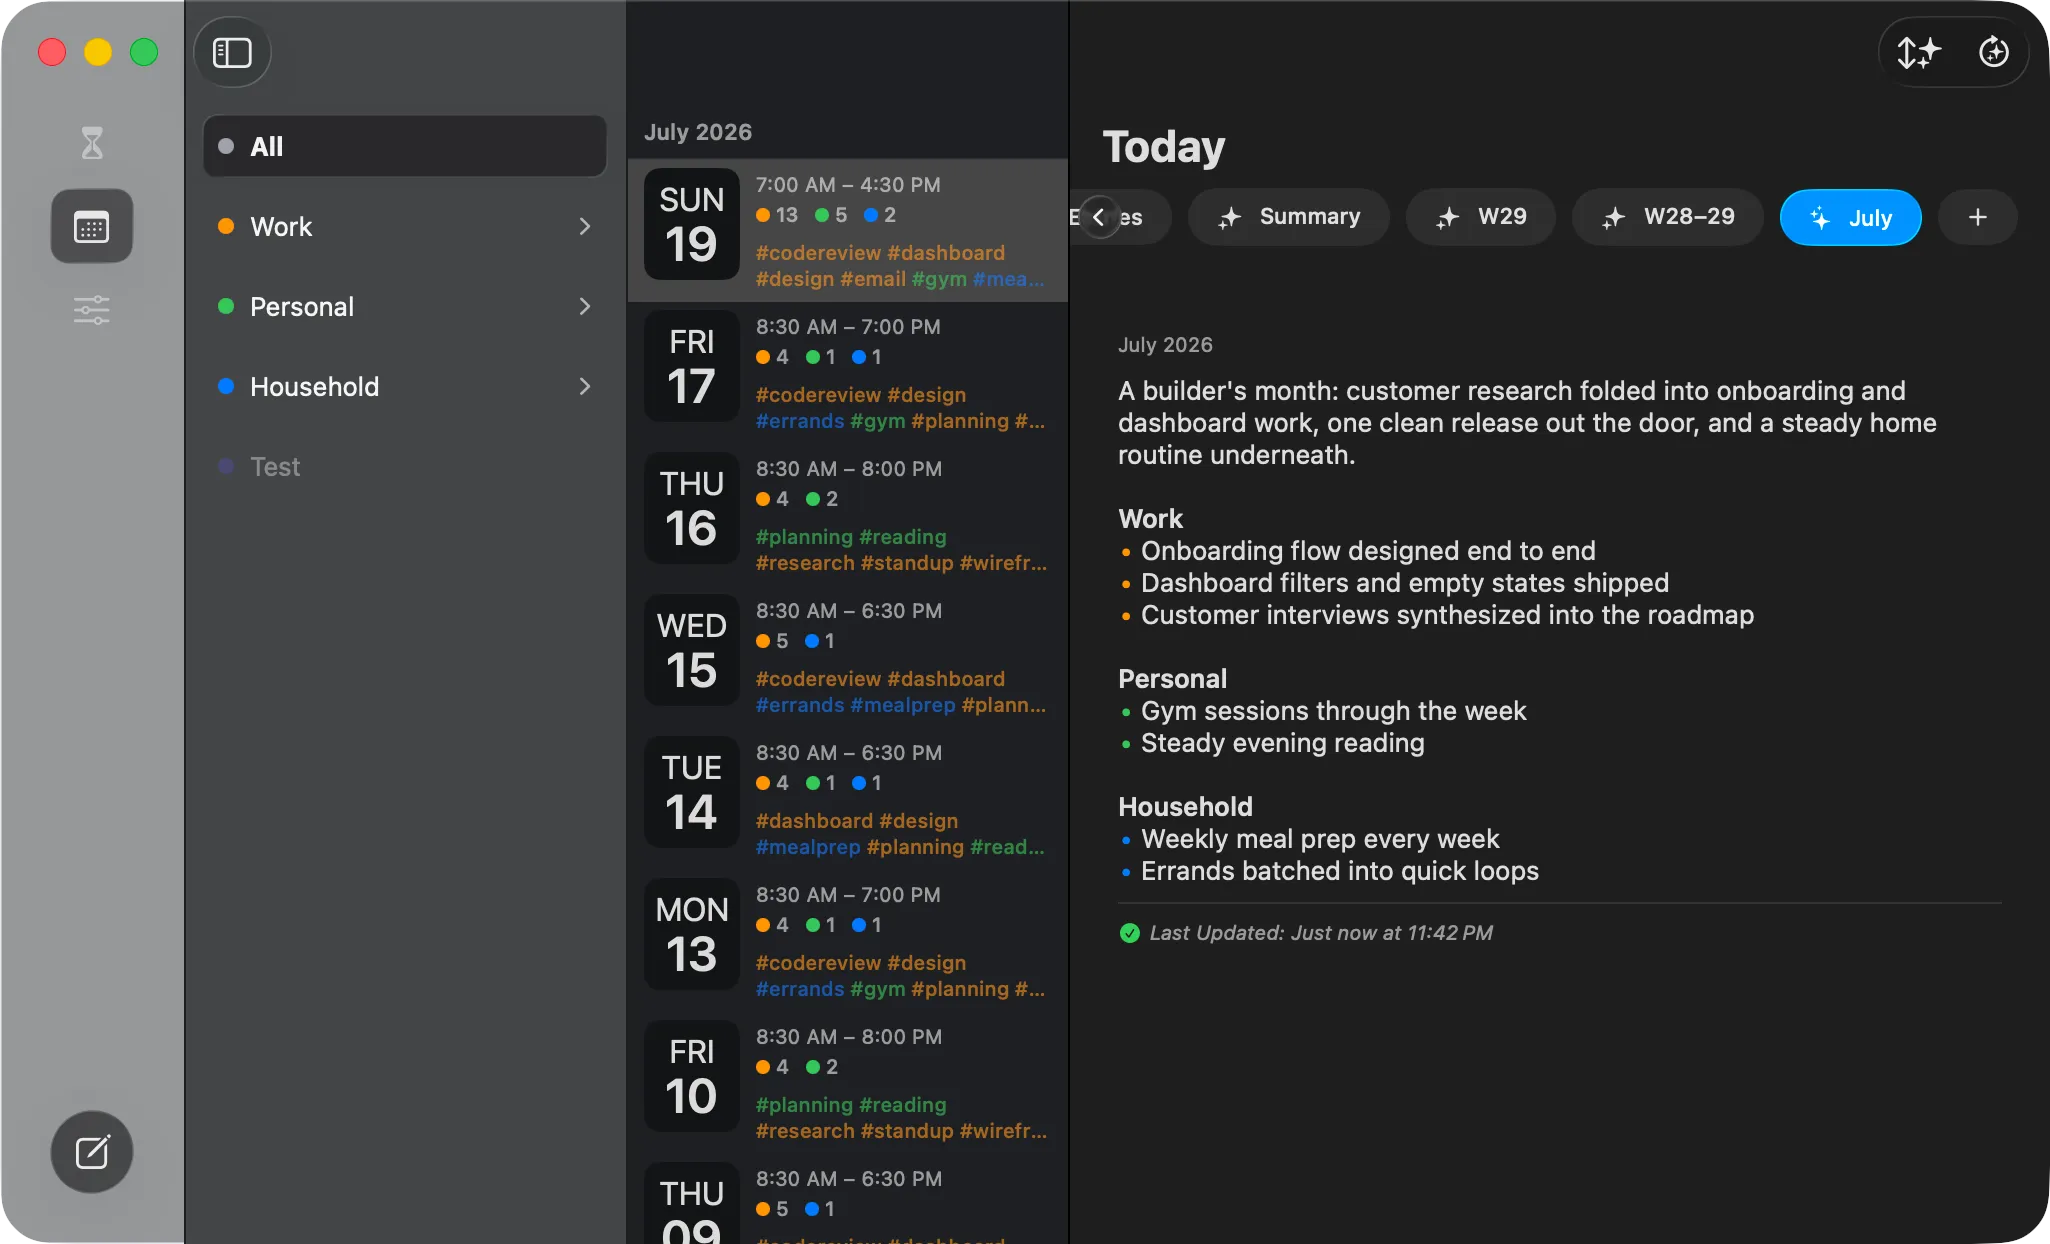 A month summary page — the July header, the overview, and a section per journal.
Keeping summaries fresh
Section titled “Keeping summaries fresh”Every summary page ends with a Last Updated row — “Last Updated: 3 hours ago at 2:41 PM.”
- A green checkmark means you’re current — entries haven’t changed since this summary was written.
- An orange refresh icon means entries have changed since — tap the row to regenerate.
There’s also a Refresh Summary button in the toolbar whenever you’re on a summary page — it wears Epilog’s AI mark, and its tooltip tells you which AI will do the work. Regenerating a month-or-longer summary always shows the cost estimate again first — no surprise spending, even on a refresh.
What a summary looks like
Section titled “What a summary looks like”Every summary follows the same shape: a quick overview up top, then a section per journal, in the same order as your categories list — a line or two of prose plus bulleted highlights for each. If you’re filtering My Days to a single category, the summary follows suit. And you can select and copy any summary to paste elsewhere.
Choosing who writes it
Section titled “Choosing who writes it”In Settings → AI Provider, pick one of three:
| Provider | Where it runs | Notes |
|---|---|---|
| Apple Intelligence | On your device | Private — nothing leaves your Mac, iPad, or iPhone. Needs a recent OS and a supported device. This is the default. |
| Claude API | Anthropic’s servers | Bring your own Anthropic key. Billed to you. |
| ChatGPT API | OpenAI’s servers | Bring your own OpenAI key. Billed to you. |
The two cloud options are bring-your-own-key (BYOK): you paste your own API key and Epilog uses it directly. Your entries are sent to that provider only when you generate a summary, and usage is billed to your key.
Adding a key (for Claude or ChatGPT)
Section titled “Adding a key (for Claude or ChatGPT)”- Go to Settings → AI Provider and pick Claude API or ChatGPT API.
- Paste your key into the secure field (it looks like
sk-ant-…for Claude orsk-…for ChatGPT) and tap Save. It’s stored securely in your device’s Keychain — never in plain settings. - Tap Verify Key to confirm it works.
- Choose a Model and an Effort level (the lists come live from the provider). Higher effort = more thorough, slower, and a bit more cost.
You can Remove a saved key any time.
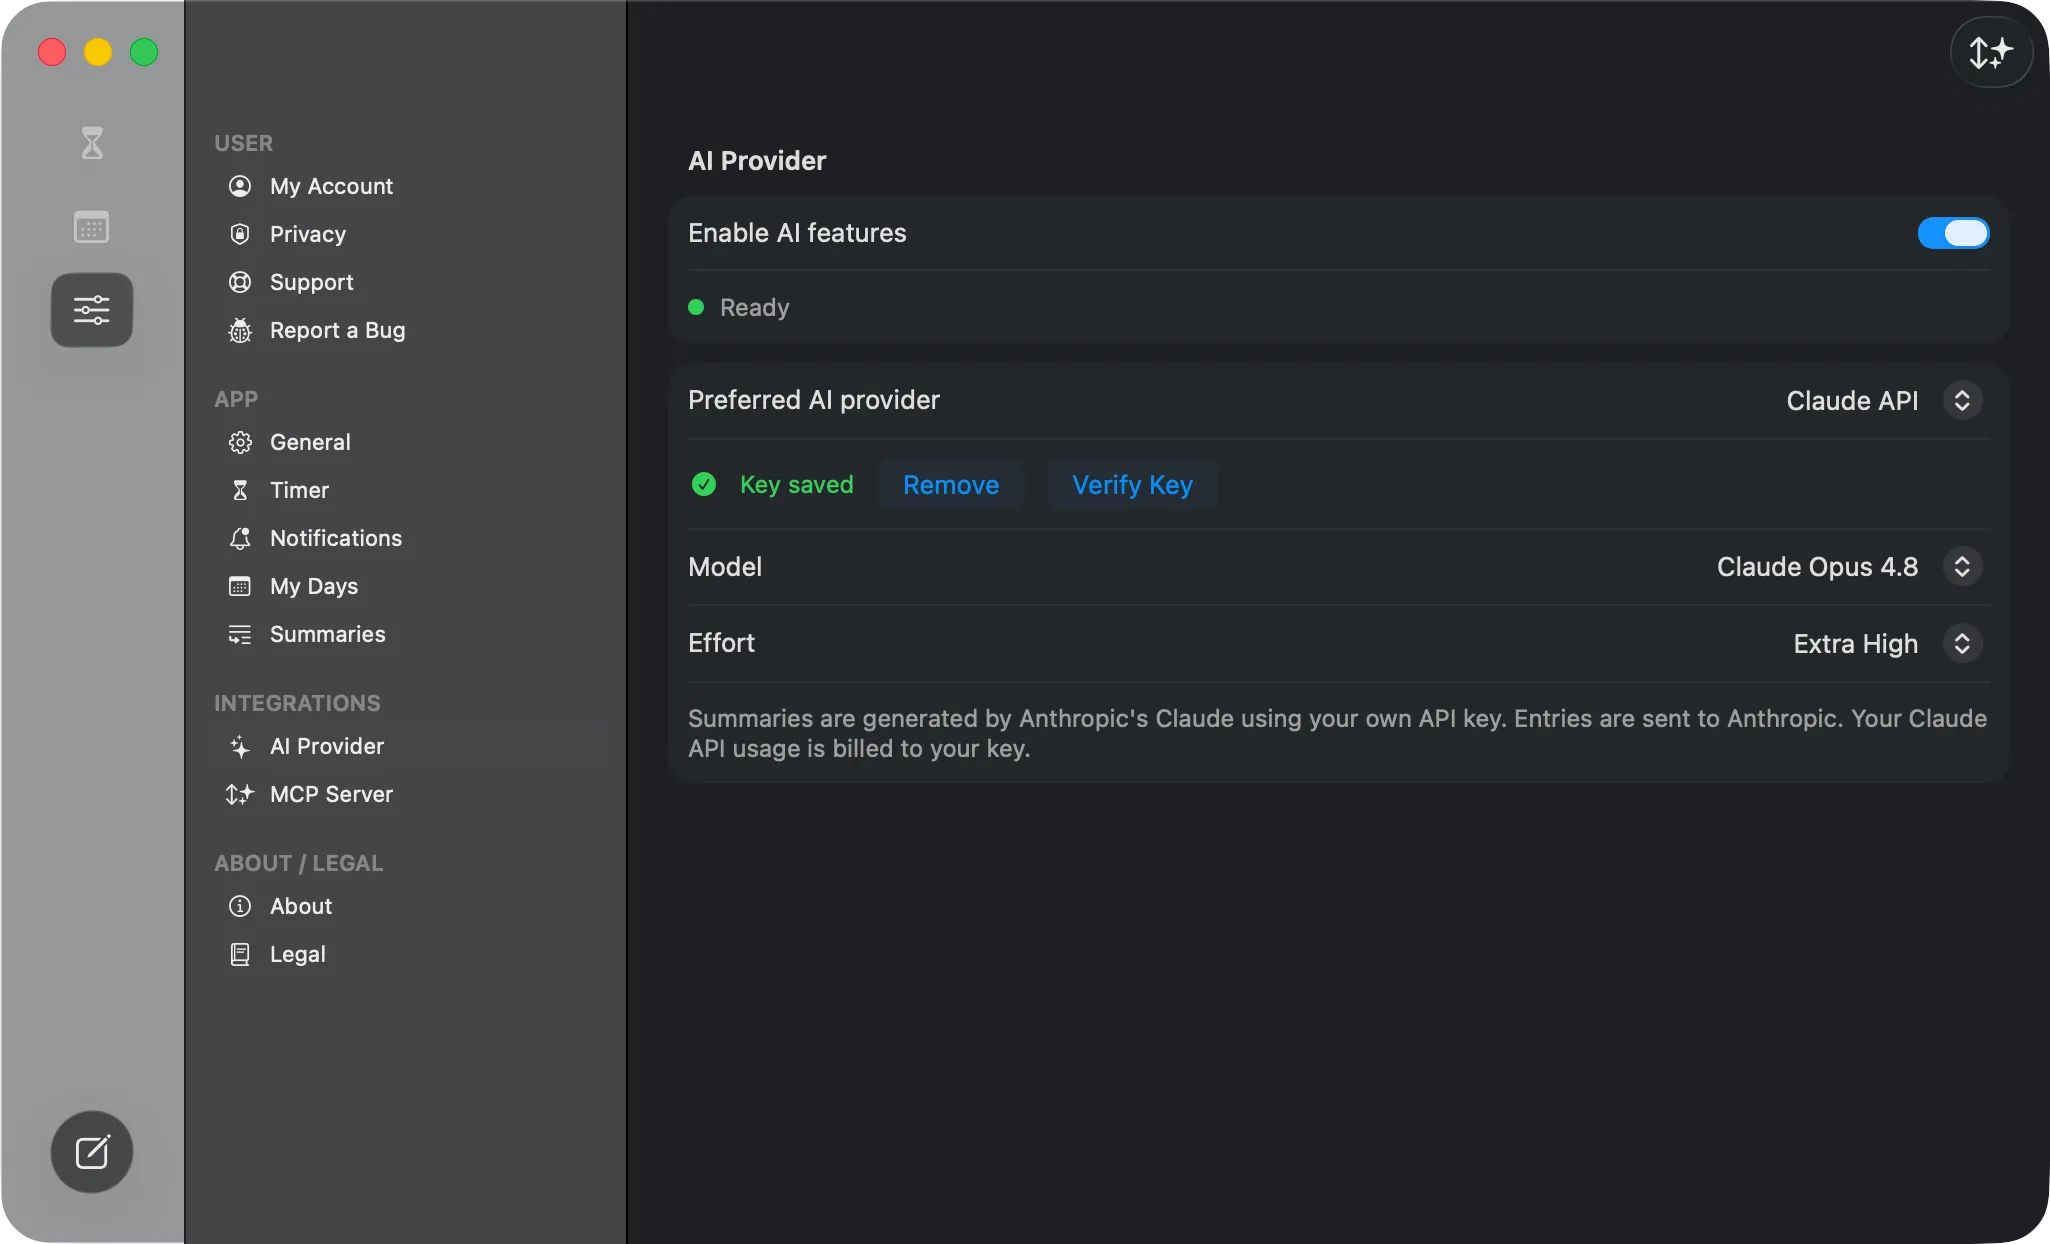 The AI Provider settings — the Enable AI features toggle, provider picker, the saved-key controls, and the Model and Effort pickers.
Tuning the summaries
Section titled “Tuning the summaries”Settings → Summaries has one Auto-generate switch per short timeframe — This Day, Week, and Two Week. A switch on means: when you open that pill and your entries have changed, Epilog regenerates the summary for you. Month and longer never auto-generate — those are always yours to trigger from the day view. The switches sync across your devices.
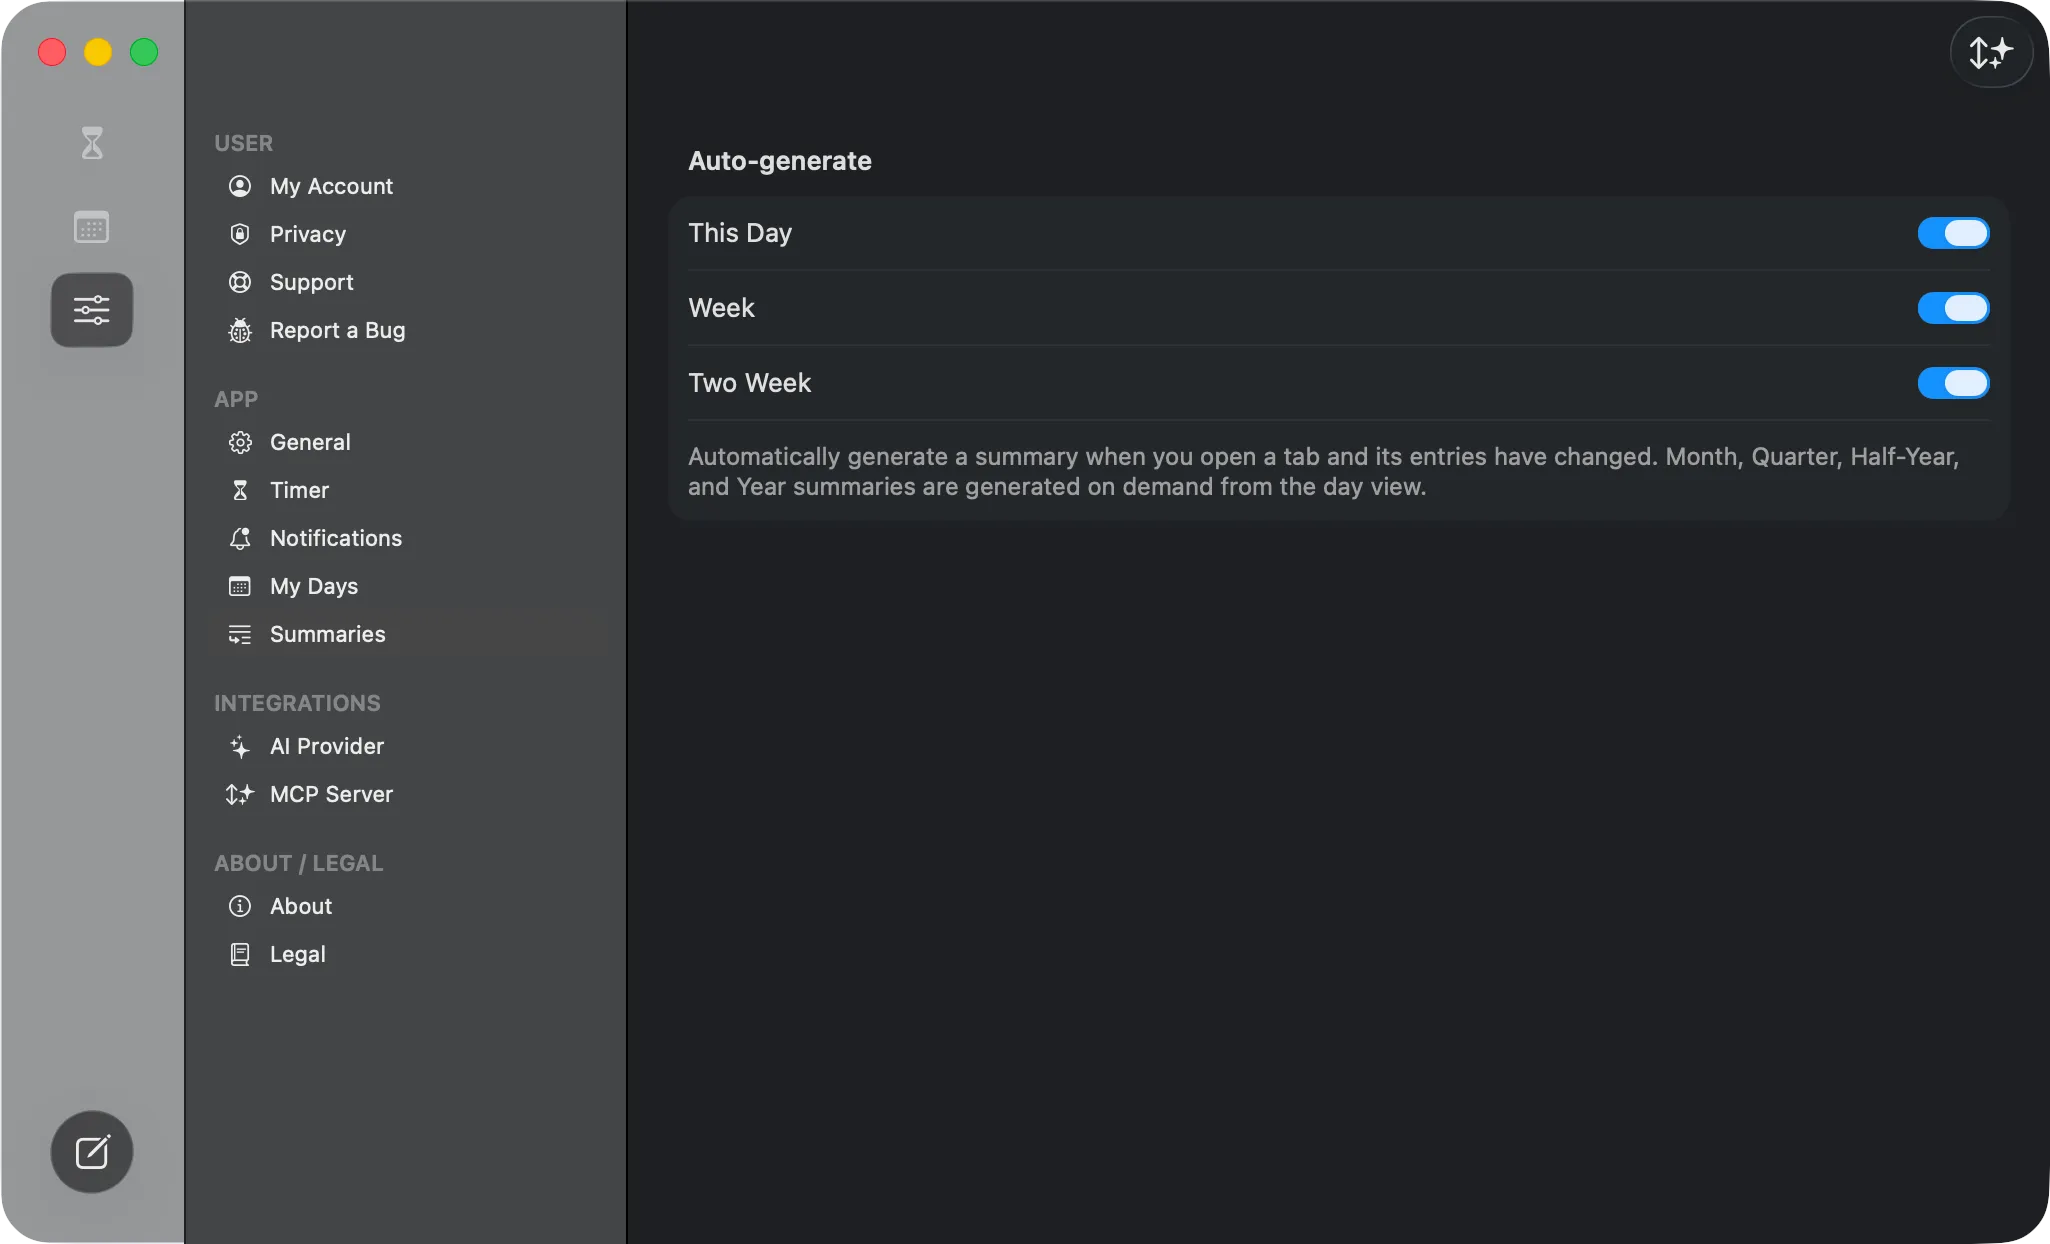 The Settings → Summaries screen — one Auto-generate switch each for This Day, Week, and Two Week.
Turning AI off entirely
Section titled “Turning AI off entirely”Don’t want any of this? Settings → AI Provider → Enable AI features turns the whole thing off. Summary pages simply note that AI features are off, and nothing is ever generated or sent.
Back to the Epilog User Guide, or on to Settings.