My Days
Where you look back. My Days is your whole history — every day, every entry — organized so you can find things fast.
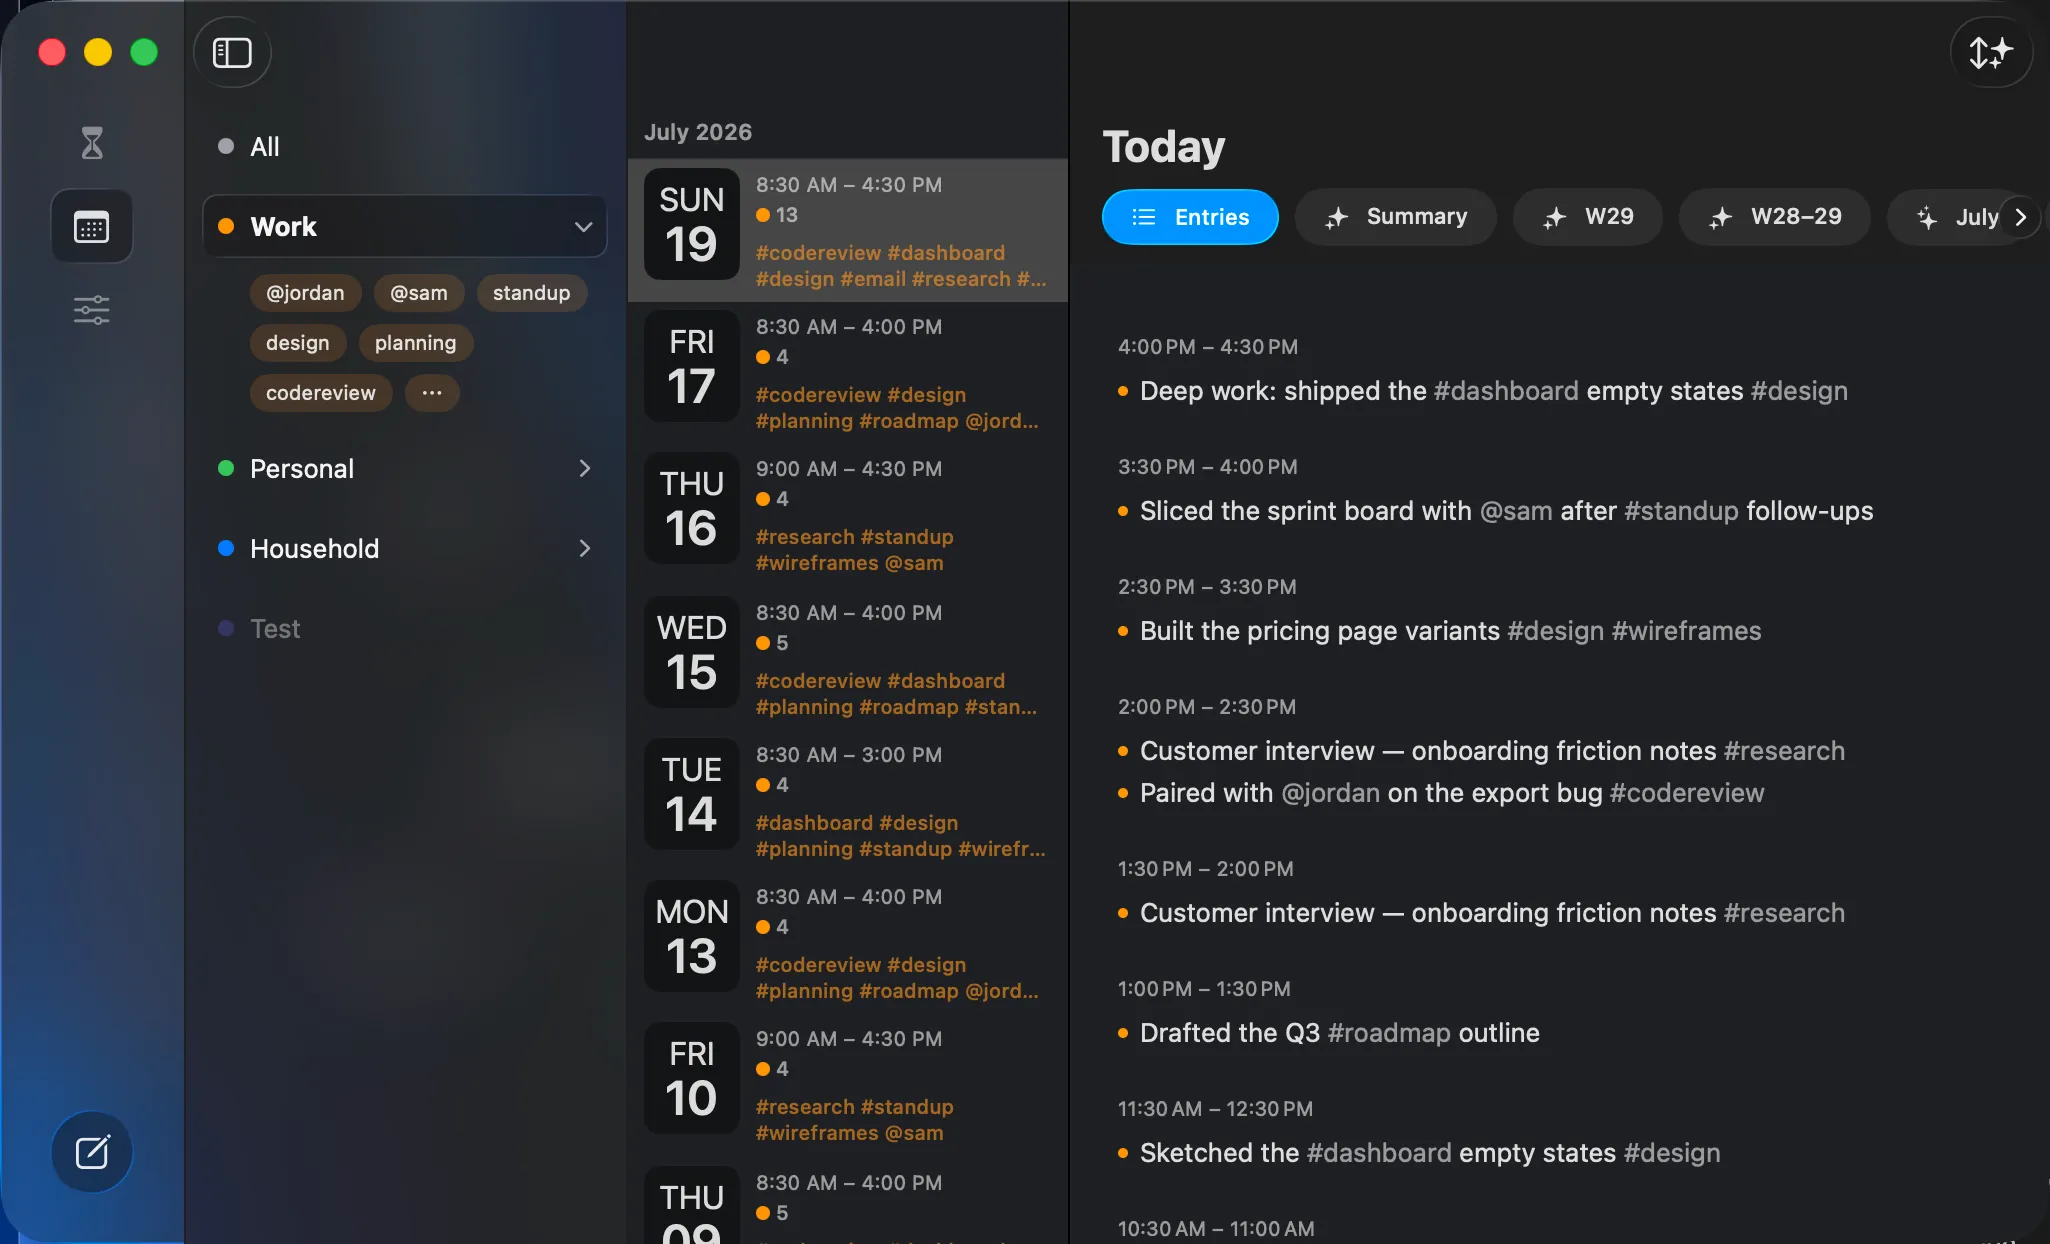 My Days on Mac. Categories run down the left — each with its own tag cloud — and the selected day fills the right, with the Entries / Summary pill bar up top.
The layout
Section titled “The layout”Epilog shows up to three columns — Categories, Days, and Entries:
- iPad landscape & wide Mac windows: all three side by side.
- Narrower windows: the Days list tucks away, leaving Categories and the day’s Entries (as above). Use the Toggle Categories button in the Mac toolbar to hide or show the category column.
- iPhone: a list of days that opens into that day’s entries. The Filter by Category button (top left) slides open a category drawer with your journals and their tag clouds.
Browsing by category
Section titled “Browsing by category”The Categories column has an All row, each of your categories (with its colored dot), and an Uncategorized row when relevant. Tap one to filter the day list to just that category — remember, each category is really its own journal.
On iPhone and iPad, the title above the day list follows your filter — My Days when you’re looking at everything, the journal’s name when you’ve picked one, and Work / #invoicing when you’re down to a single tag. One glance tells you what you’re browsing.
The day list
Section titled “The day list”Days are grouped by month. Each row shows the weekday and date, the time range you were active, small colored dots for how much you did in each category, and any tags from that day. Tap a day to see its entries.
Filtering by tag: tag clouds
Section titled “Filtering by tag: tag clouds”Under a category (tap its chevron to expand — on iPhone the categories and their clouds live in the slide-in drawer) is a tag cloud — a cluster of pills, one per tag you’ve used, tinted with the category color (you can see the Work cloud expanded in the screenshot above).
- Tap a pill to filter the day list to just that tag. Tap it again to clear.
- Long lists collapse to a few rows with a “…” pill — tap it to show all tags, and the “×” pill to collapse again.
This is how you answer “when did I last work on X?” or “how much time went to @acme?” — tap the tag and the days filter down.
Reading a day
Section titled “Reading a day”Selecting a day opens its Entries page — the date and the day’s entries. Tap any entry to edit it. A day with nothing logged shows a friendly empty state inviting you to add an entry. The day’s AI summary lives one step away, on the Summary pill — read on.
Entries, summaries, and the pill bar
Section titled “Entries, summaries, and the pill bar”Above each day sits a row of pills — think of them as pages for that day:
- Entries — the day’s log (where you land).
- Summary — the day’s AI summary.
- Week and Two-Week — summaries of the stretches around that day, always available.
- Month, Quarter, Half-Year, Year — longer summaries that appear once you’ve generated them.
- + — add one of those longer summaries.
Pills are named for the period the selected day falls in — W29, W28–29, July, Q3, H2 2026, 2026 — so you always know exactly what stretch you’re looking at.
On iPad and iPhone, swipe between the pages. On Mac, click a pill; if the row overflows, scroll it with the chevron arrows at either end.
One exception: Today has no pills — your current day’s summary shows inline on the Today screen.
 The pill bar on a day in My Days — Entries selected, with the Summary and period pills alongside.
Next: Summaries — let Epilog write the recap for you.